
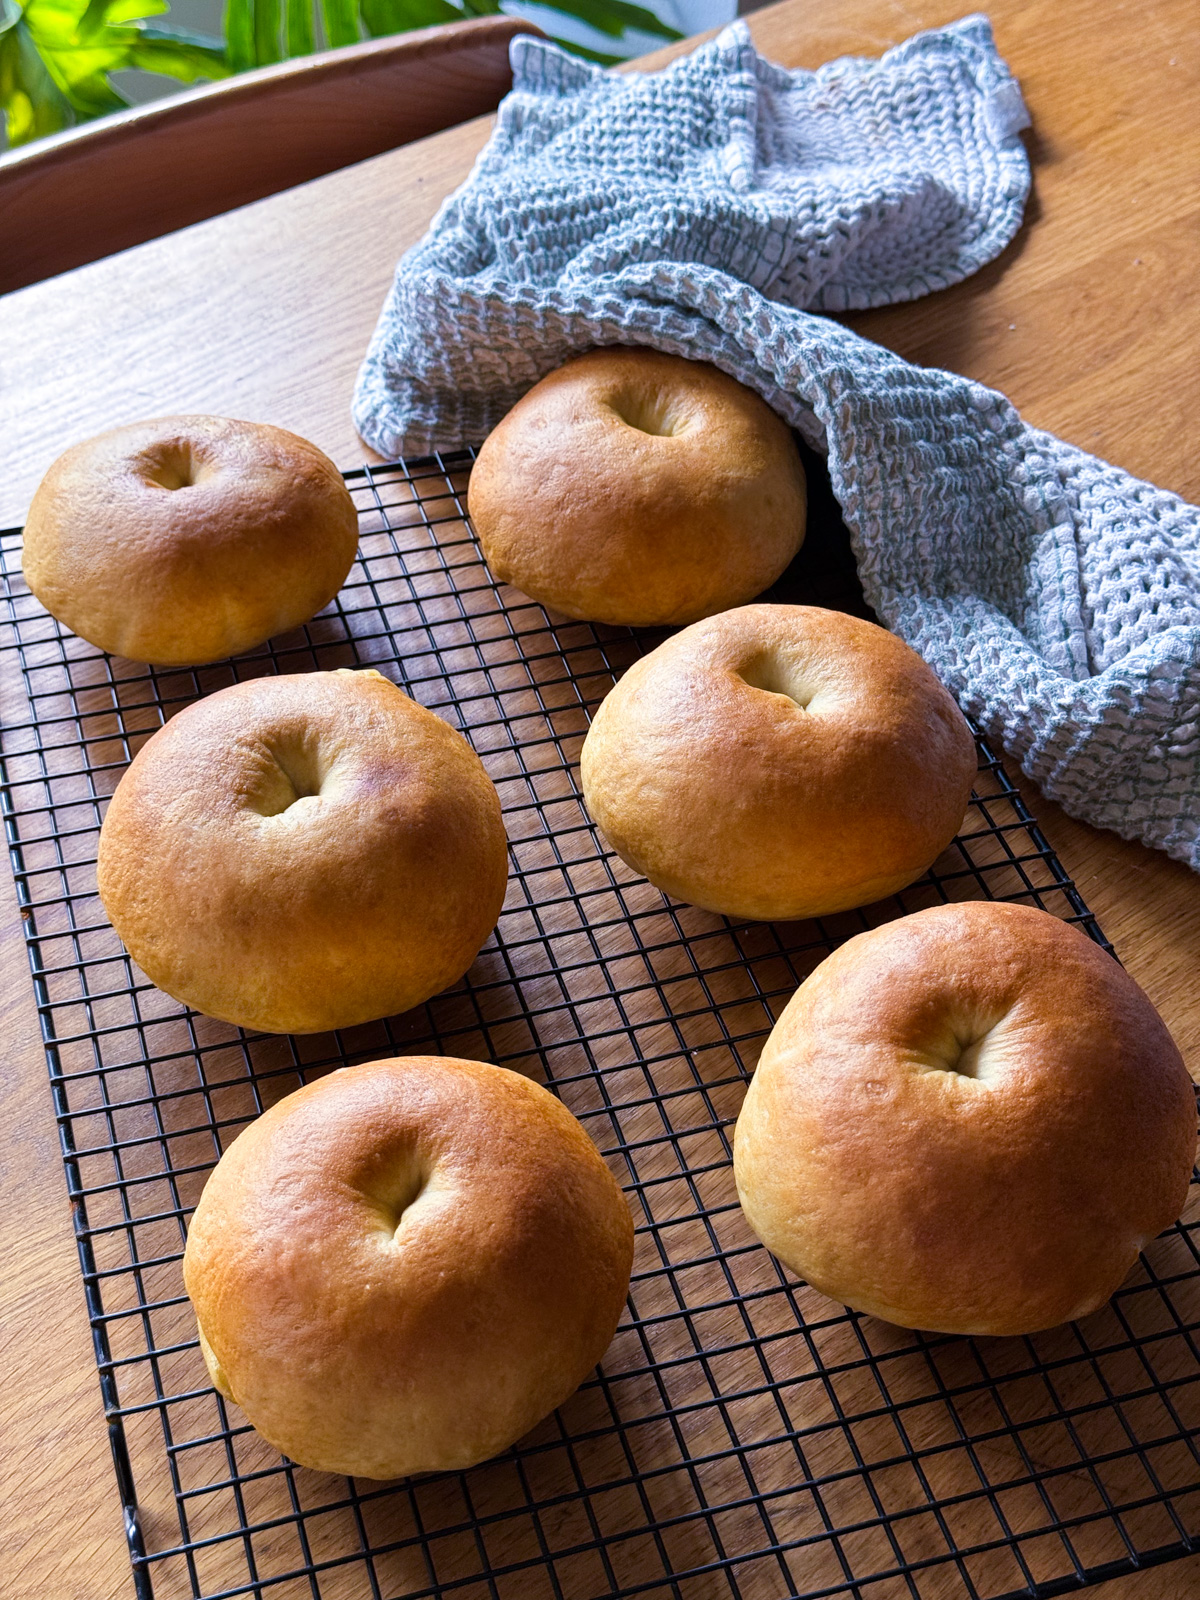
My sourdough discard bagels are soft, chewy, and perfectly golden! The base recipe makes six bagels, so it works easily for small families or doubles to twelve for larger households without an overwhelming amount of bagels at the end.
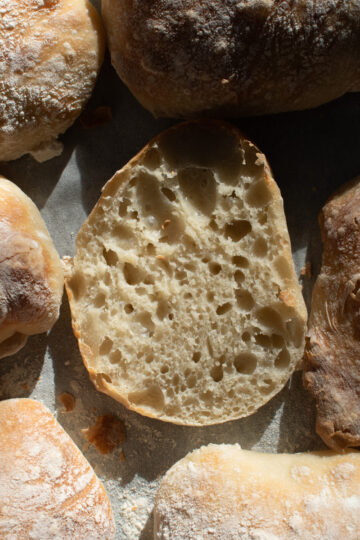
If you love sourdough discard bread recipes, you'll love my sourdough discard ciabatta rolls! I make these bagels in rotation with my sourdough sandwich bread and sourdough discard sandwich bread — we always need some basic bread food in the house at all times.
Quick Look: Sourdough Discard Bagels
⏱️ Ready In: About 3 hours (including resting)
🔥 Bake Time: 18 minutes
🍽️ Serves: 6 bagels (easily doubled to 12)
✨ Calories: Approximately 344 per bagel
🥄 Main Ingredients: Sourdough discard, bread flour, yeast, malted milk powder
🌿 Dietary Info: Vegetarian (easily made vegan)
💛 Why You'll Love It: Soft, chewy, golden bagels that use up lots of discard with minimal yeast.
SUMMARIZE & SAVE THIS CONTENT ON
Why You'll Love This Recipe
- Uses lots of discard: This recipe was built to maximize the amount of sourdough starter you use while keeping a classic bagel flavor — a great alternative to tossing discard or making yet another batch of sourdough discard cinnamon swirl bread. If you are looking for another easy way to use up sourdough discard, try my sourdough pie crust and sourdough chicken pot pie!
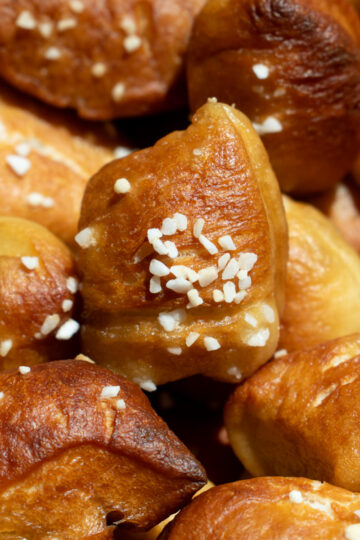
- That classic chewy bite: A quick boil in a brown sugar and baking soda bath gives these the signature chewy crust and golden color, just like my sourdough discard pretzel bites.
- Right-sized for a family: Six bagels is perfect for a small household, and the recipe doubles cleanly to twelve when you need more.
- Minimal ingredients, minimal yeast: Just a handful of pantry staples and a little yeast to help the discard along.
- Endlessly customizable: Sweet, savory, or plain — top them however your family likes (my very picky toddler eats them completely plain, crumbs everywhere).
Jump to:
- Quick Look: Sourdough Discard Bagels
- Why You'll Love This Recipe
- Ingredients You'll Need
- Easy Substitutions & Variations
- How to Make Sourdough Discard Bagels
- Expert Tips
- What Makes This Recipe Special?
- Sourdough Discard Bagels FAQs
- Sourdough Discard Bagels Troubleshooting Guide
- Storage
- Other Bread Recipes to Consider
- Sourdough Discard Bagels
Ingredients You'll Need

- warm water + sugar + yeast: Bloomed together to give the discard a reliable, quick rise.
- sourdough discard: The star — straight from the fridge, no need to feed it first.
- bread flour: Preferred for the chewiest bite, but all-purpose works fine too (it's what I use most of the time).
- malted milk powder: Optional but recommended — it gives that classic, can't-quite-place-it bagel flavor. Milk powder or malt powder both work as swaps.
- salt: For flavor and to control the rise.
- brown sugar + baking soda (for the water bath): The boil that gives bagels their chewy, golden crust — the same trick behind my sourdough discard garlic butter dinner rolls when I want a deeply browned top.
See the recipe card for quantities.
Easy Substitutions & Variations
- Flour: Use all-purpose flour if you don't have bread flour — this is what I do most of the time.
- Malted milk powder: Use regular milk powder or malt powder (preferred), or leave it out altogether. I like it for that classic taste that's hard to replace.
- Sweet topping: Sprinkle with cinnamon and sugar after boiling.
- Savory topping: Top with everything bagel seasoning after boiling.
- Simple topping: Sprinkle with sesame seeds after boiling.
- Make it a sandwich: These hold up beautifully as a breakfast or lunch sandwich — pair the idea with my easy sourdough discard hotdog buns and soft sourdough discard burger buns when you want a whole bread spread.
How to Make Sourdough Discard Bagels
Note: I bake by weight for accuracy. Cup measurements are approximate and may vary depending on how you scoop.

Step 1: Bloom the yeast: Add the warm water (less than 120°F), sugar, and yeast to the bowl of a stand mixer (recommended, but a regular bowl works). Let rest about 5 minutes until the yeast has bloomed.

Step 2: Mix and knead: Add the remaining ingredients and mix on low. This is a very dry dough, so it takes time to come together — usually about 15 minutes of kneading once it's cohesive. Keep going, it will come together. Give your stand mixer periodic breaks, as a dry dough is hard on the motor.

Step 3: First rise: Once the dough is thoroughly kneaded and passes the windowpane test, cover with a wet towel or cling wrap and let it rest in a warm place for 60–90 minutes.

Step 4: Shape: Once doubled, turn the dough onto a floured surface and divide into 6 equal pieces (about 130–135g each). Poke your finger through the center of each ball and stretch it into a bagel shape. The holes shrink as they rise and bake, so stretch generously if you want a pronounced hole.

Step 5: Second rise: Let the bagels rest 30–60 minutes, until slightly puffy. Don't over-proof — if they rise too long here they won't puff as much when baked. Gently re-stretch the holes before boiling if needed.

Step 6: Boil and bake: Bring a pot of water to a rolling boil and add the brown sugar and baking soda (it will foam). Drop in the bagels, boil 1 minute, flip with a slotted spoon, and boil 1 minute more. Place on a lined baking sheet, sprinkle with toppings, and bake at 425°F for 18 minutes.
Weigh your ingredients! Using a kitchen scale ensures your measurements are accurate, which is key for getting consistent results in baking. It takes the guesswork out of measuring and helps your recipes turn out exactly as intended every time.
Expert Tips
- Don't skip the baking soda. It's what gives the bagels their beautiful golden-brown color in the boil.
- Give your stand mixer breaks. This is a very dry, stiff dough — pause periodically during kneading so you don't burn out the motor.
- Don't over-proof the second rise. Over-proofing leads to flatter, wrinkly bagels. Be conservative; they'll still taste great even if slightly deflated.
- Stretch the holes generously. They shrink as the bagels rise and bake, so make them bigger than you think you need.
- Weigh your dough pieces. About 130–135g per piece gives you six even bagels that bake at the same rate.
What Makes This Recipe Special?
Most bagel recipes call for an active, fed starter or a long overnight ferment. This one is built around discard and a little yeast, so you get that classic chewy, malty bagel without the wait — the same quick-discard philosophy behind my same-day sourdough crescent rolls.
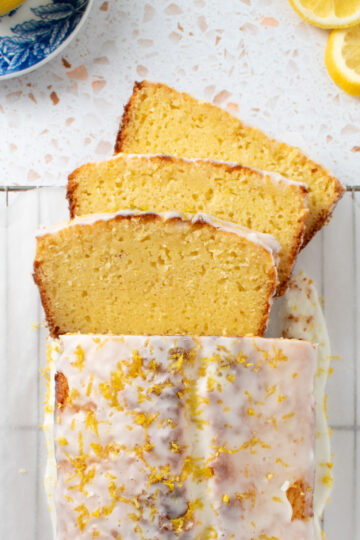
The brown sugar and baking soda boil is the other secret. That quick bath sets the crust and delivers the signature chew and golden color you expect from a real bagel. If you enjoy a slightly more involved enriched bread next, my Finnish pulla braided cardamom bread is a lovely weekend project.
Sourdough Discard Bagels FAQs
Yes! Use malt powder or omit the milk powder altogether. There are no eggs, milk, or other dairy products in this recipe.
Yes! Just weigh the starter, since active starter weighs less per cup than discard.
Absolutely — that's why it's built for six. Double everything (a full 2 ¼ teaspoon packet of yeast) for twelve bagels.
They were over-proofed during the second rise. Be conservative with that rest time; they only need to look slightly puffy before boiling.
Sourdough Discard Bagels Troubleshooting Guide
| Problem | Cause | Fix |
|---|---|---|
| Flat, wrinkly bagels | Over-proofed in the second rise. | Boil once slightly puffy — don't wait too long. |
| Pale, not golden | Baking soda was left out of the water bath. | Always add baking soda to the boil for color. |
| Dough won't come together | It's a very dry dough — needs more kneading. | Keep kneading (with mixer breaks) until it passes the windowpane test. |
| Holes closed up | Not stretched enough before baking. | Stretch the holes generously; they shrink as they bake. |
| Dense, tough crumb | Under-kneaded or under-proofed first rise. | Knead to windowpane and let it fully double in a warm spot. |
Storage
- Store in a ziplock bag at room temperature for up to 3–5 days.
- Freeze in an airtight container for up to 6 months — toast straight from frozen.
Other Bread Recipes to Consider


Did you make this recipe?
If you try this recipe, I’d love if you left a quick rating and review below! It really helps support my blog and lets others know how the recipe turned out for you. Also, don't forget to tag me @kneadedthat on Instagram and use the hashtag #kneadedthat so I can see what you made and share it!

Sourdough Discard Bagels
Equipment
- Stand Mixer (optional but recommended)
- Large pot for boiling
- Slotted spoon or spatula
- Baking sheet
- Parchment Paper
Ingredients
Sourdough Discard Bagels
- 1 teaspoon yeast if doubling, use a 2 ¼ teaspoon packet
- 171 grams warm water ¾ cup
- 1 ½ tablespoons sugar
- 190 grams sourdough discard ¾ cup
- 420 grams bread flour 3 ½ cups; all-purpose is fine too
- 1 tablespoon malted milk powder optional — can use milk powder or malt powder
- 1 ½ teaspoons salt
Water Bath
- 1 tablespoon baking soda
- 1 tablespoon brown sugar
Instructions
- Bloom the yeast: Add the warm water (less than 120°F), sugar, and yeast to the bowl of a stand mixer (recommended, but a regular mixing bowl works). Let rest roughly 5 minutes until the yeast has bloomed.1 teaspoon yeast, 171 grams warm water, 1 ½ tablespoons sugar
- Mix and knead: Add the remaining ingredients and mix on low speed. This is a very dry dough, so it will take time to come together — usually about 15 minutes of kneading once cohesive. Keep kneading; it will come together. Be sure to periodically give your stand mixer a break, as it's hard on the motor to work such a dry dough.190 grams sourdough discard, 420 grams bread flour, 1 tablespoon malted milk powder, 1 ½ teaspoons salt
- First rise: Once the dough is thoroughly kneaded and passes the windowpane test, let it rest in a warm place covered with a wet towel or cling wrap for 60–90 minutes.
- Shape: Once the dough has doubled, turn it onto a floured surface and split into 6 equal pieces (about 130–135g each). Poke your finger through the center of each ball and stretch it into a bagel shape. The holes shrink while rising and baking, so stretch generously for a pronounced hole.
- Second rise: Let the bagels rest 30–60 minutes, or until slightly puffy. Don't over-proof — if they rise too long here, they won't be as puffy after baking.
- Boil and bake: While the bagels rise, bring a pot of water to a rolling boil. Add the brown sugar and baking soda (it will foam at first). Drop in the bagels and boil 1 minute, then flip with a slotted spoon and boil 1 minute more. Place on a parchment-lined baking sheet, add toppings, and bake at 425°F for 18 minutes.1 tablespoon baking soda, 1 tablespoon brown sugar
Notes
- Sweet — sprinkle with cinnamon and sugar after boiling.
- Savory — top with everything bagel seasoning after boiling.
- Simple — sprinkle with sesame seeds after boiling.
Paige Gary says
Homemade bagels can’t be beat - sourdough discard bagels sound amazing! Also your bagels came out incredible. Can’t wait to see how mine turn out!!