
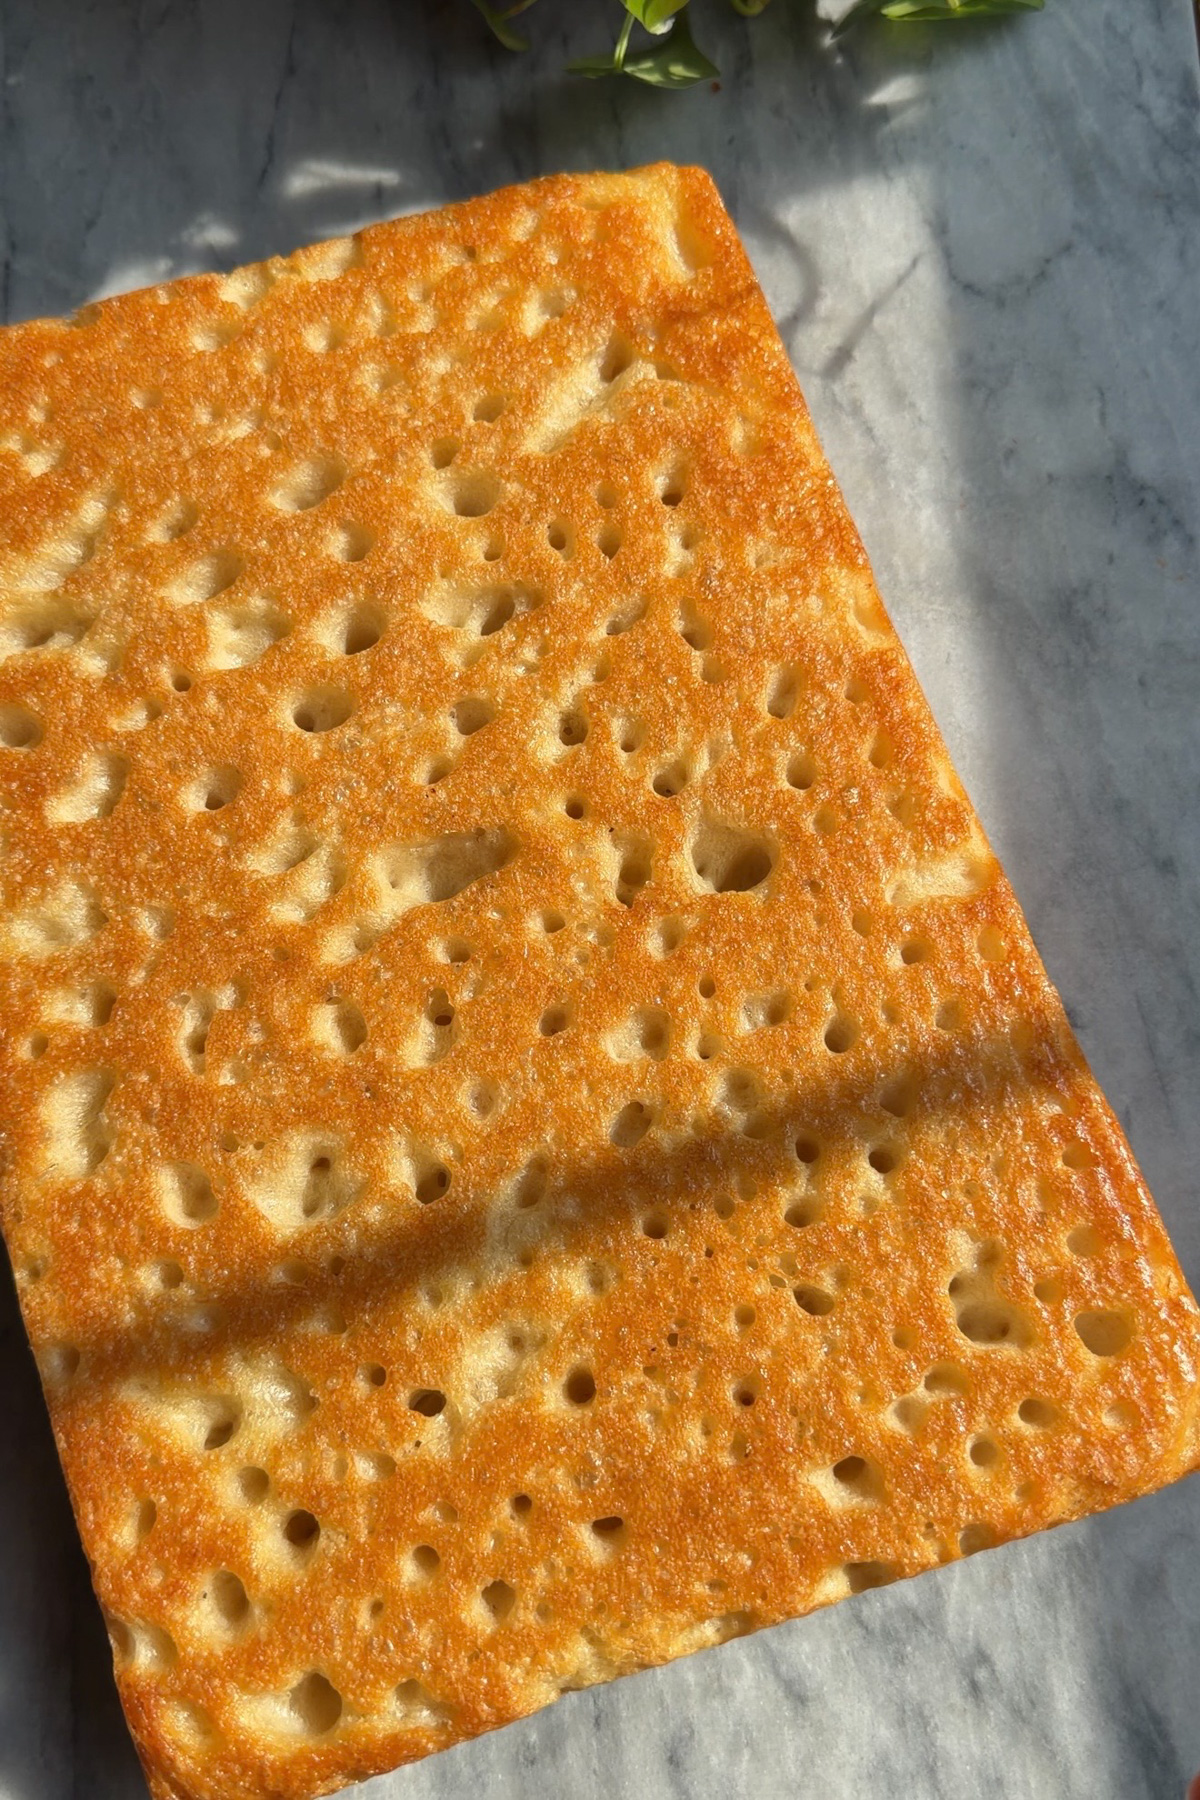
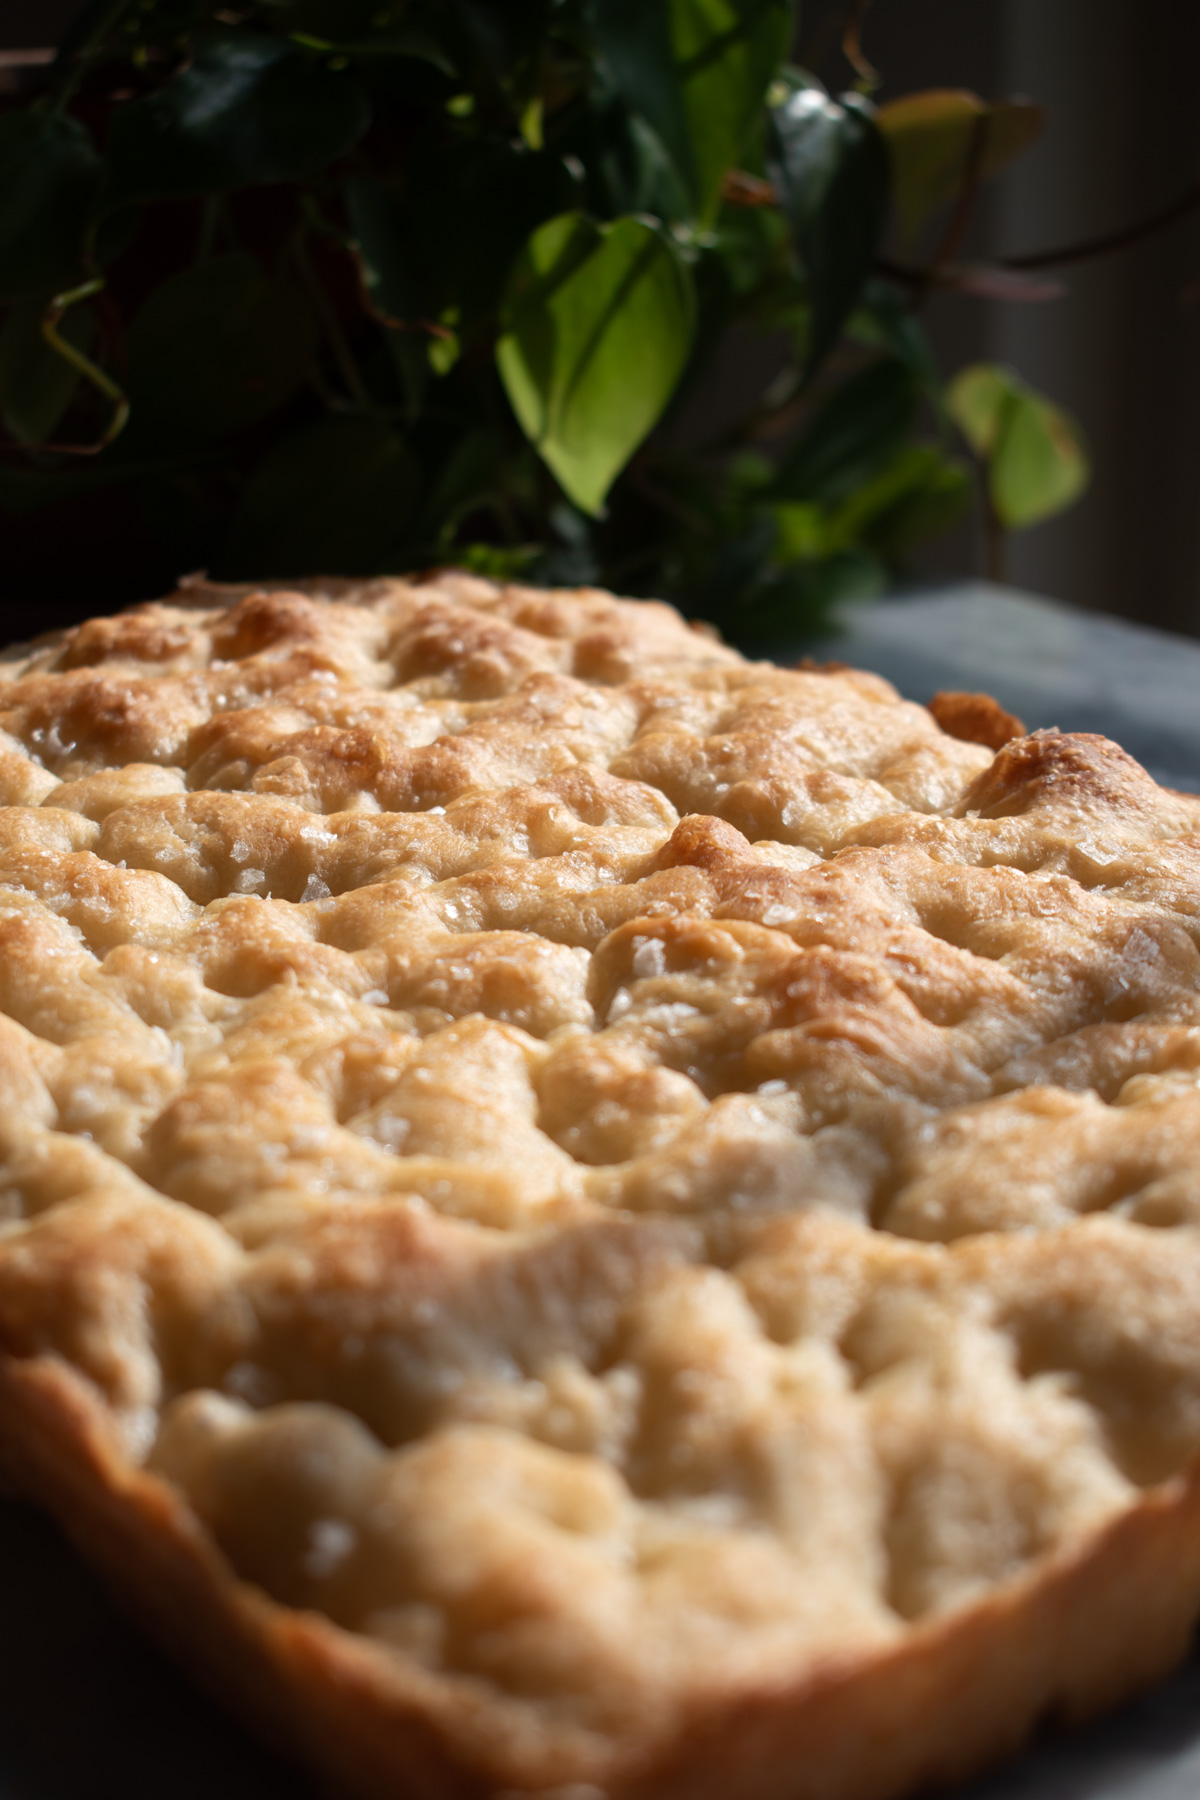
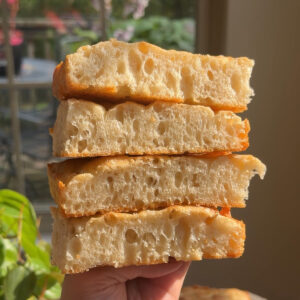
This Sourdough Discard Focaccia is airy and open-crumbed inside, deeply golden and crisp around the edges, and generous with olive oil in every bite.
If you love a high-hydration, olive-oil-rich dough, you'll also want my easy sourdough discard pizza and sourdough discard garlic knots next; and if you're building out a bread basket, my soft sourdough sandwich bread rounds things out nicely.
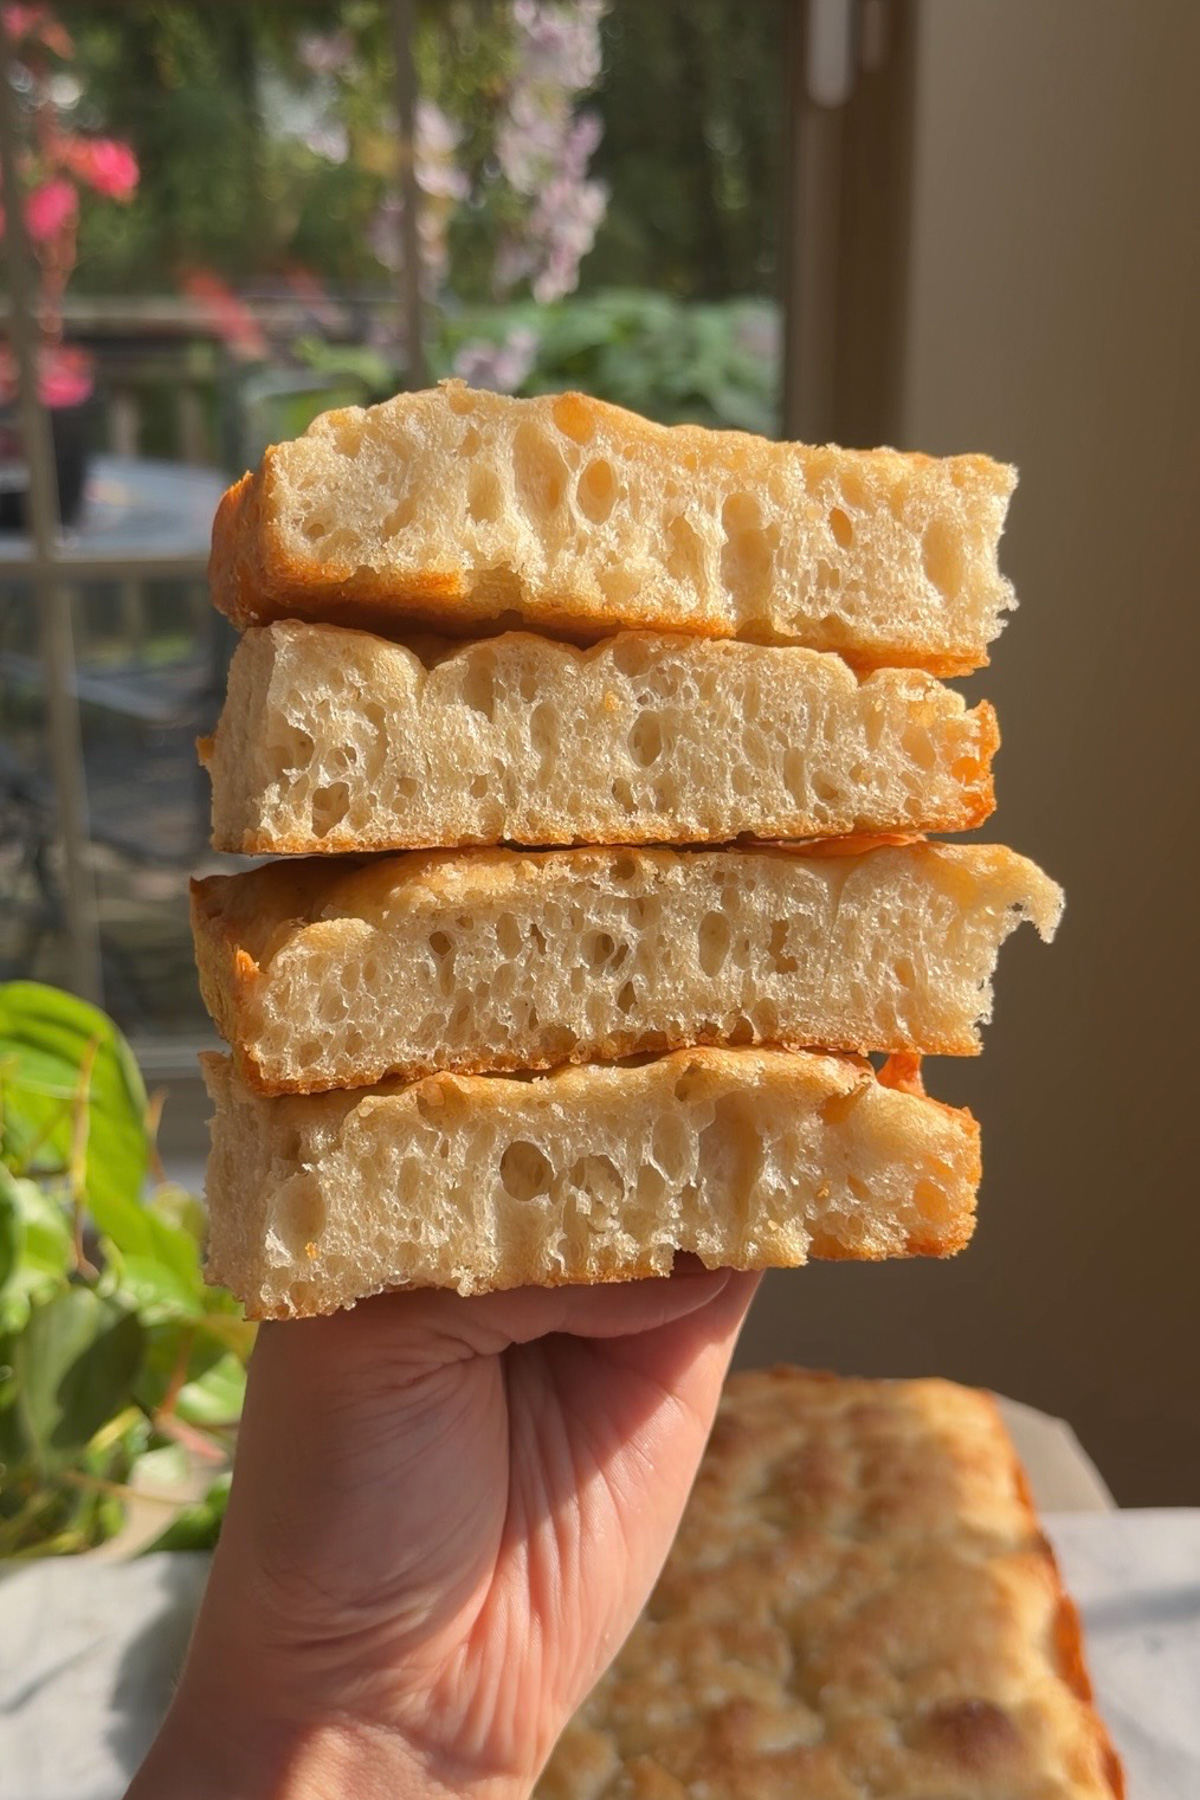
Quick Look: Sourdough Discard Focaccia
Ready In: about 3–4 hours (or overnight for the best flavor)
Bake Time: 23–28 minutes
Serves: one 9x13-inch focaccia, about 12 pieces
Calories: ~168 per piece
Main Ingredients: sourdough discard, olive oil, instant yeast, flaky sea salt
Dietary: Vegetarian
Why You'll Love It: Airy, open-crumbed focaccia with a crisp, golden bottom and plenty of olive oil in every bite.
SUMMARIZE & SAVE THIS CONTENT ON
Why you'll love this recipe
- A genuinely great use for discard. No feeding or waiting on your starter to peak; straight discard goes right into the dough alongside instant yeast for reliable rise, similar to how I use discard in my sourdough discard ciabatta rolls.
- Big, open holes without much effort. A wet, high-hydration dough and a few rounds of stretch and folds do the real work here; no kneading required.
- The overnight option is worth it. Letting the dough rest in the fridge for 8–24 hours after the stretch and folds deepens the flavor and fits neatly around a busy day; it's genuinely my preferred way to make this bread.
- A crisp, golden bottom, guaranteed. A generously oiled metal pan essentially fries the underside of the focaccia as it bakes, the same trick behind the crust on my sourdough discard garlic butter dinner rolls.
Jump to:
- Quick Look: Sourdough Discard Focaccia
- Why you'll love this recipe
- Ingredients You'll Need
- Easy Substitutions & Variations
- How to Make Sourdough Discard Focaccia
- Overnight Option
- Expert Tips
- What Makes This Recipe Special?
- Sourdough Discard Focaccia FAQs
- Sourdough Discard Focaccia Troubleshooting Guide
- Storage
- Other Sourdough Discard Recipes to Consider
- Sourdough Discard Focaccia
Ingredients You'll Need
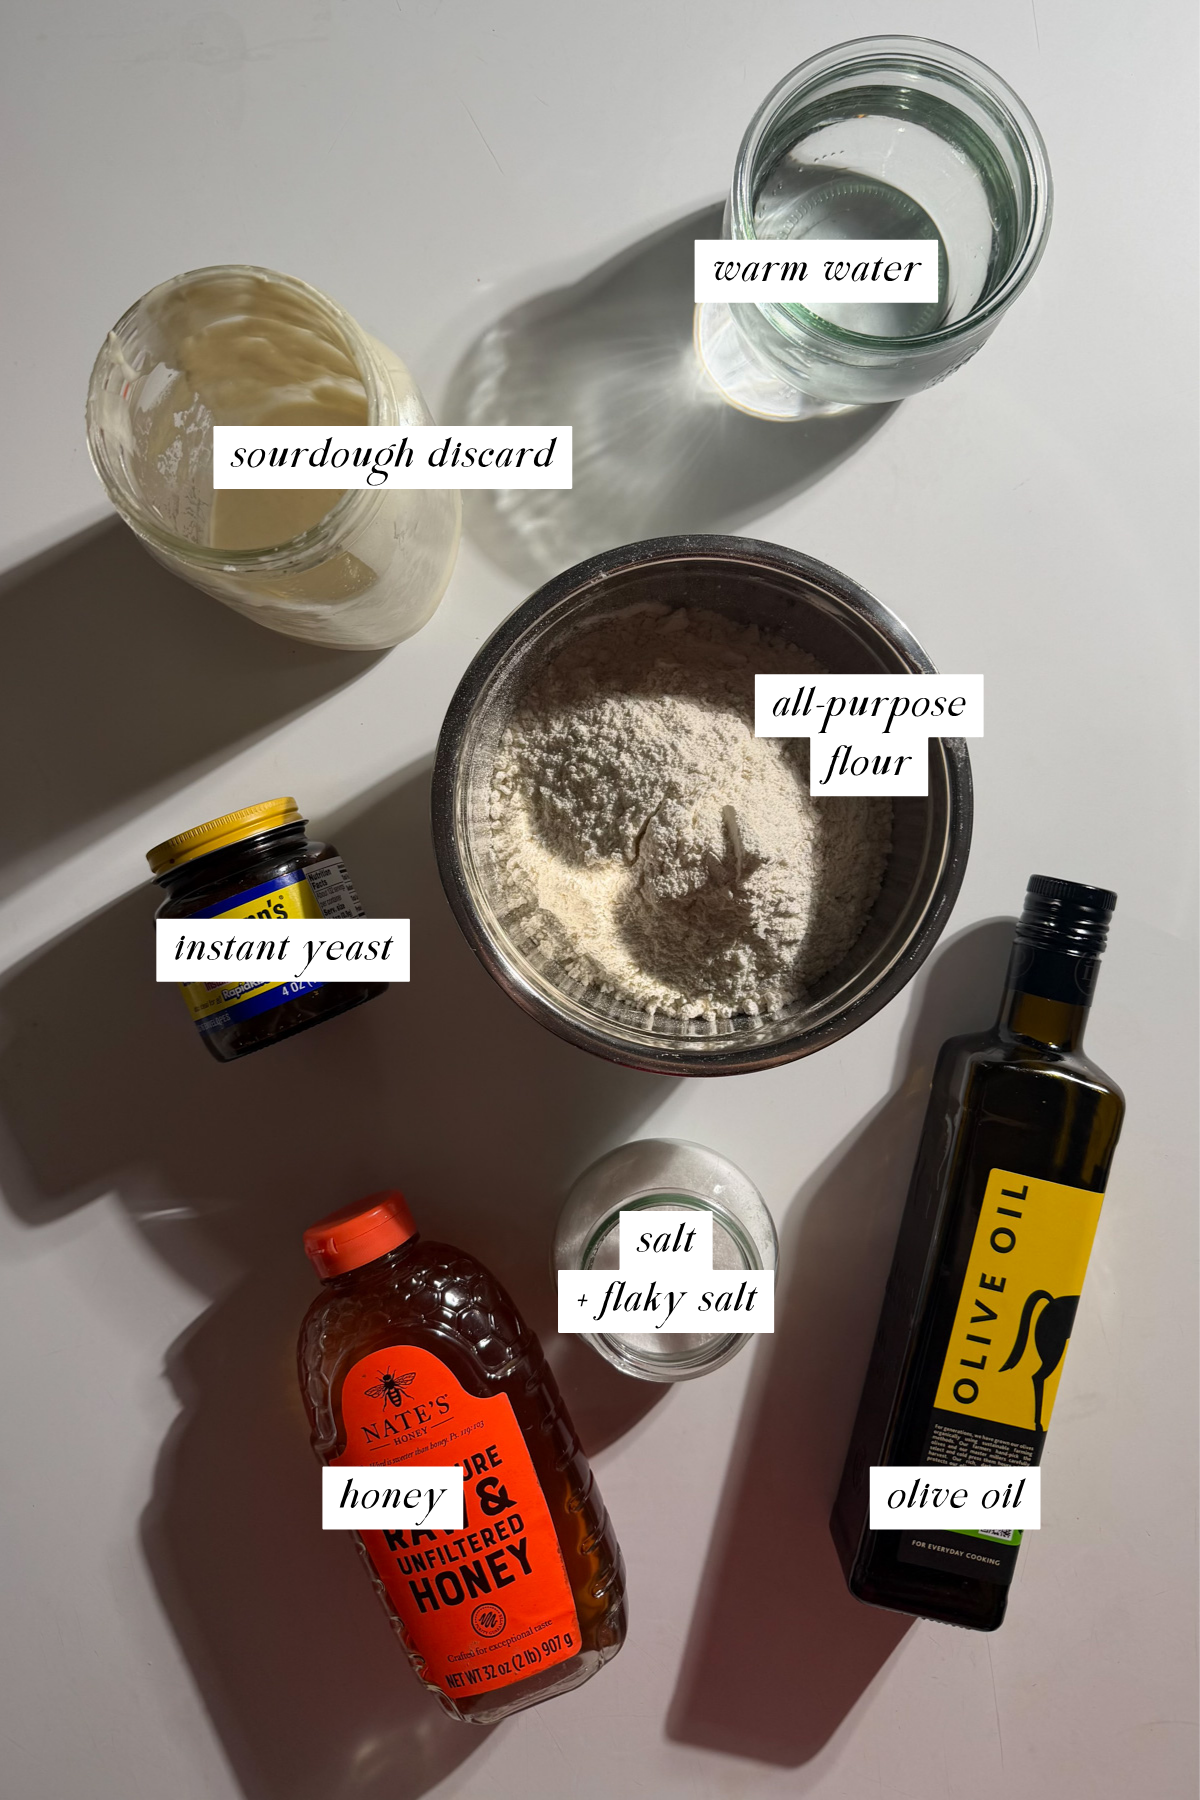
- Sourdough discard: unfed, 100% hydration discard works perfectly here; there's no need to feed it or wait for it to bubble.
- Instant yeast: gives you a reliable, same-day rise even though the discard itself isn't doing much leavening work.
- Warm water: brings the dough together into a very wet, sticky mass; that high hydration is exactly what gives focaccia its big, irregular holes.
- Honey: just a touch, to feed the yeast and round out the flavor.
- Extra virgin olive oil: used in the dough, in the pan, and drizzled over the top; don't be shy with it, similar to how generous I am with oil in my sourdough discard pizza dough.
- Flaky sea salt and fresh rosemary: the classic finishing touches, pressed into the dimples right before baking.
See recipe card for quantities.
Easy Substitutions & Variations
- No instant yeast: Active dry yeast works as a 1:1 swap; just dissolve it in the warm water for 5–10 minutes until foamy before mixing in the rest of the ingredients.
- Vegan: Swap the honey for maple syrup or agave; everything else in this recipe is already dairy-free and egg-free.
- Other toppings: Thinly sliced cherry tomatoes, thin red onion, or sliced olives all work beautifully pressed into the dimples alongside the rosemary.
- Garlic focaccia: Whisk a clove or two of finely grated garlic into the olive oil you drizzle over the top before baking.
- Want it faster? Skip the overnight option and follow the same-day timeline in the instructions; you'll still get a great focaccia, just with slightly less depth of flavor.
How to Make Sourdough Discard Focaccia
Note: I bake by weight for accuracy. Cup measurements are approximate and may vary depending on how you scoop.
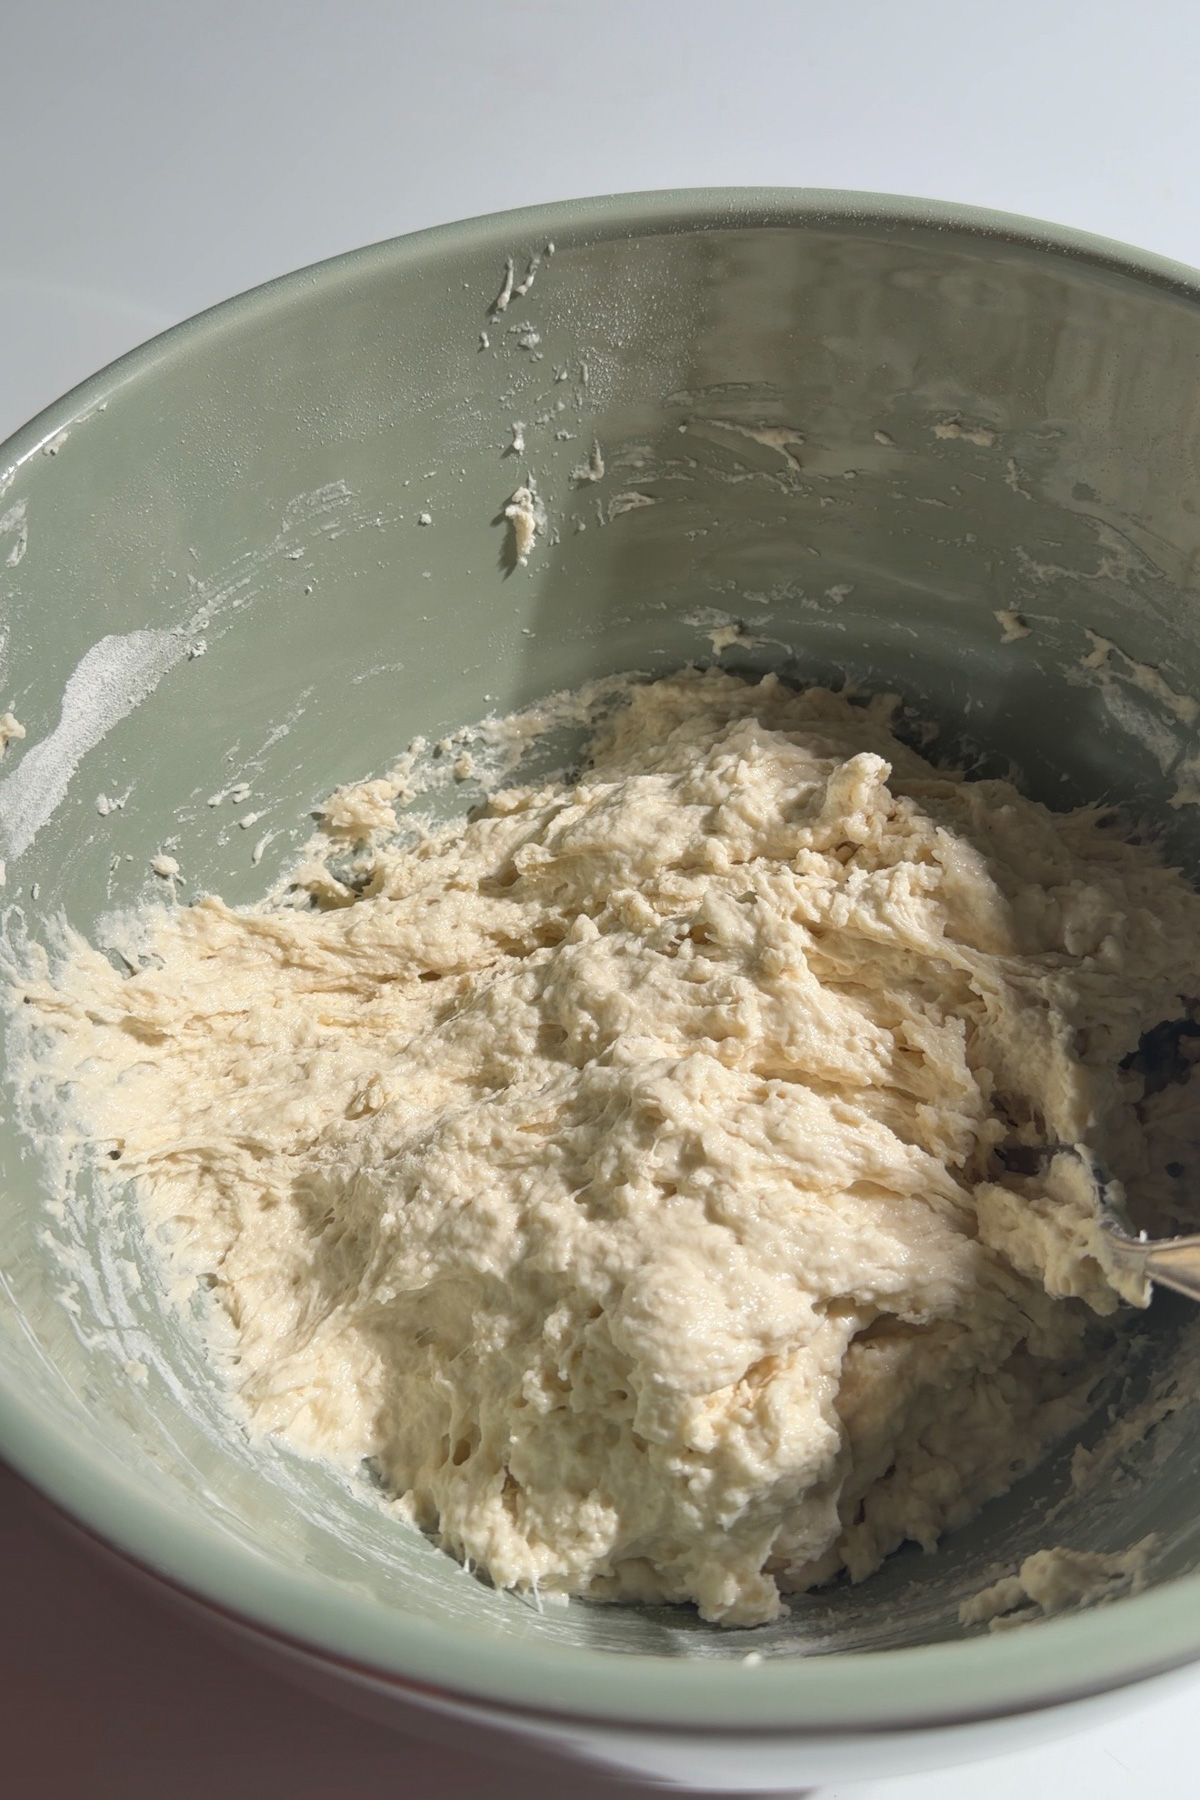
Step 1: Mix the dough. In a large bowl, whisk together the warm water, sourdough discard, honey, and instant yeast. Add the flour and salt and mix with a dough whisk, wooden spoon, or your hands until no dry flour remains. The dough will be very wet and sticky; this is intentional.
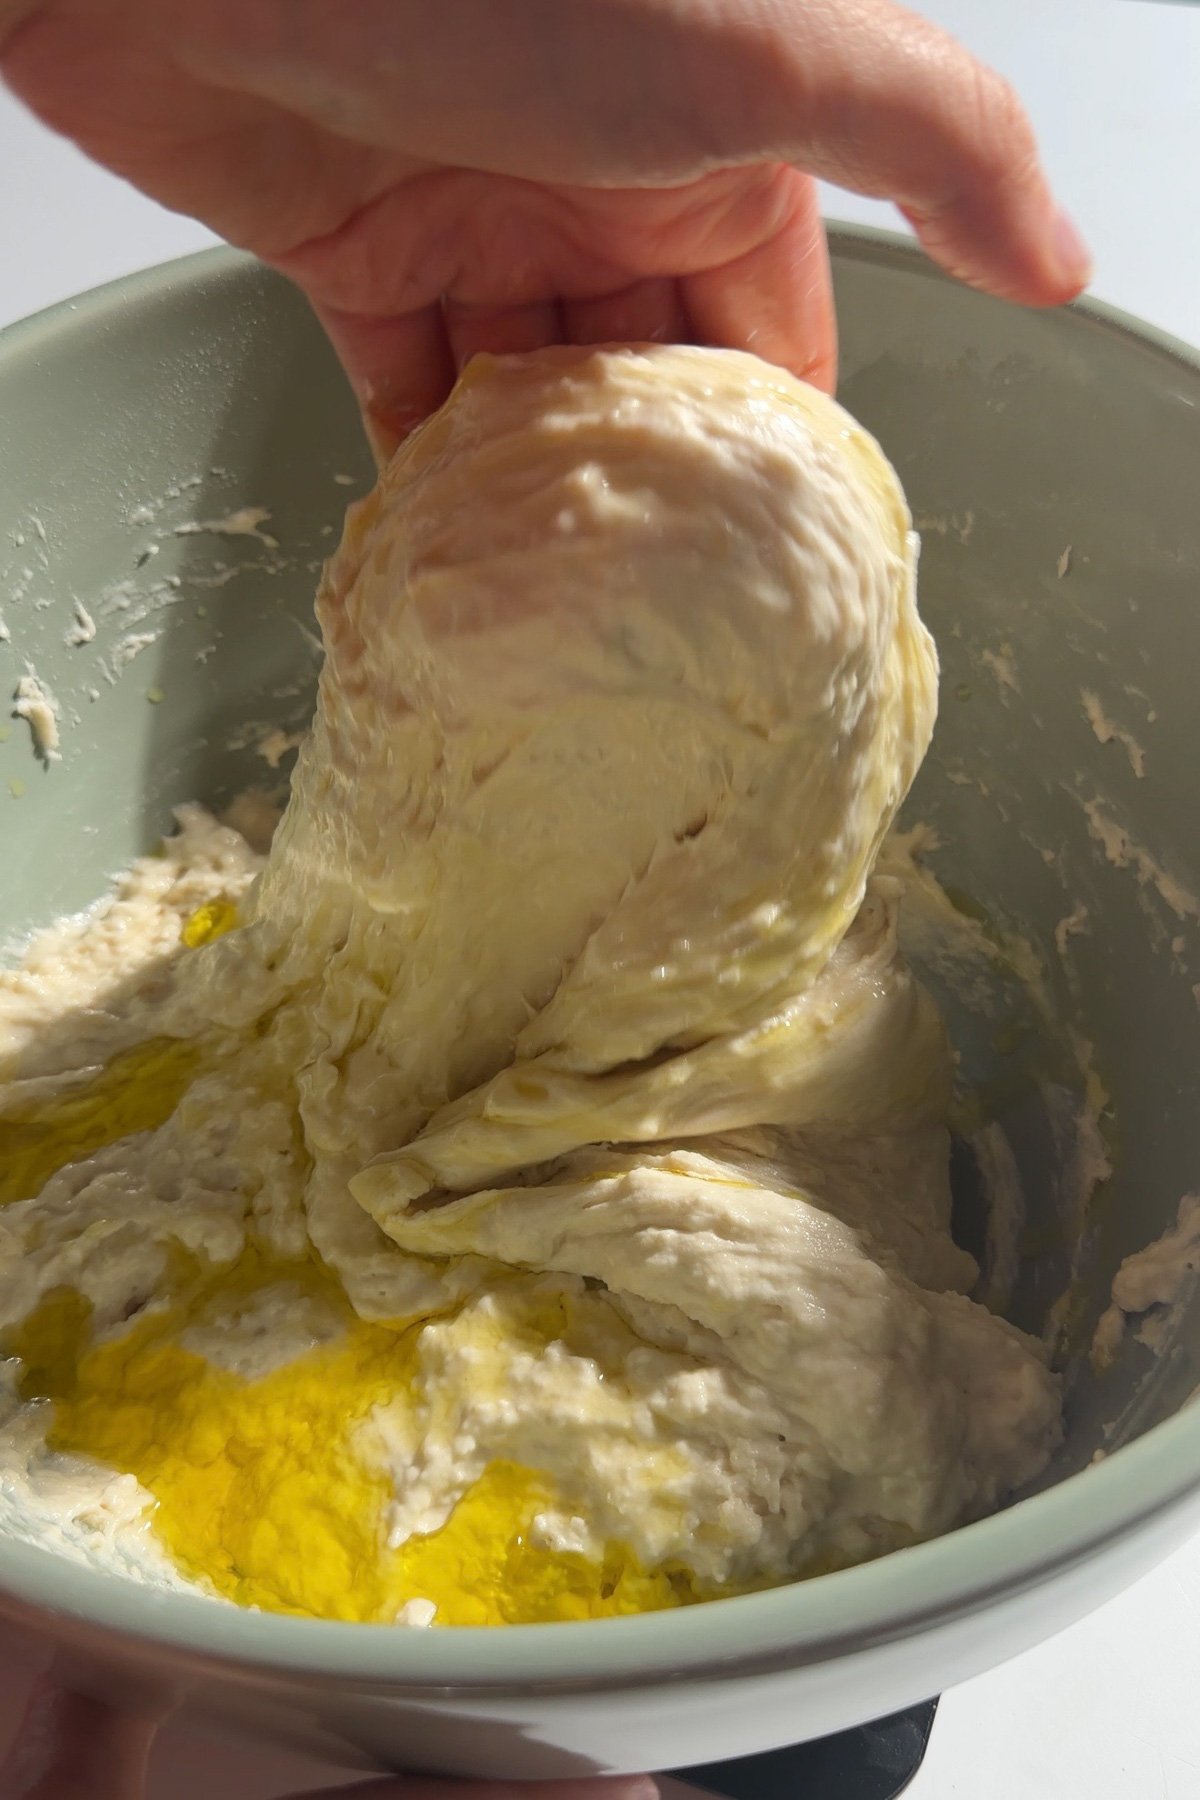
Step 2: Rest, then stretch and fold. Cover the bowl and let the dough rest for 15 minutes. Drizzle the olive oil over the dough, then with damp or lightly oiled hands, grab one side, stretch it upward, and fold it over itself; rotate the bowl and repeat on all four sides. Cover and rest 15 minutes, then repeat the stretch and fold two more times, for a total of 3 sets. The dough should feel noticeably smoother and more elastic by the end.
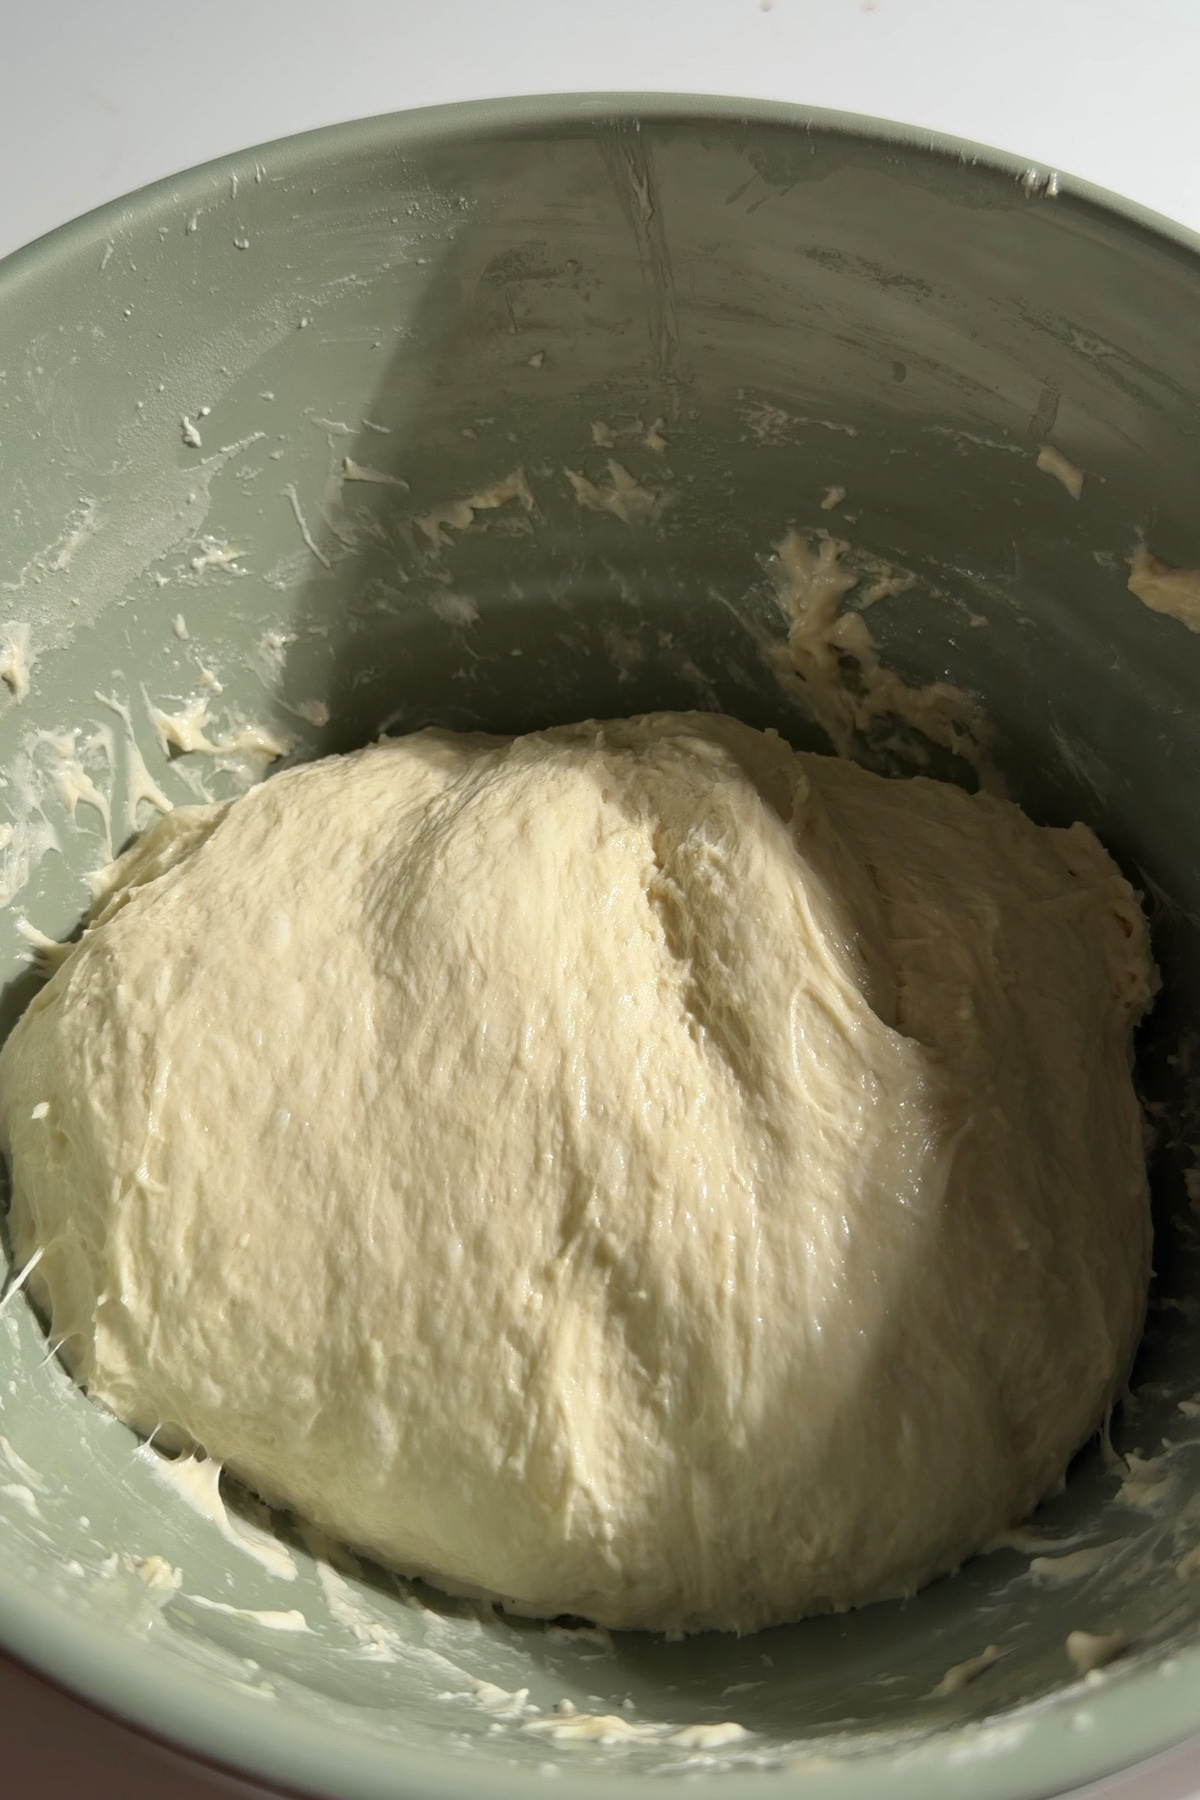
Step 3: First rise. Cover the bowl and let the dough rise at warm room temperature for 60–90 minutes, until noticeably puffy and increased in volume by roughly 50–75%.
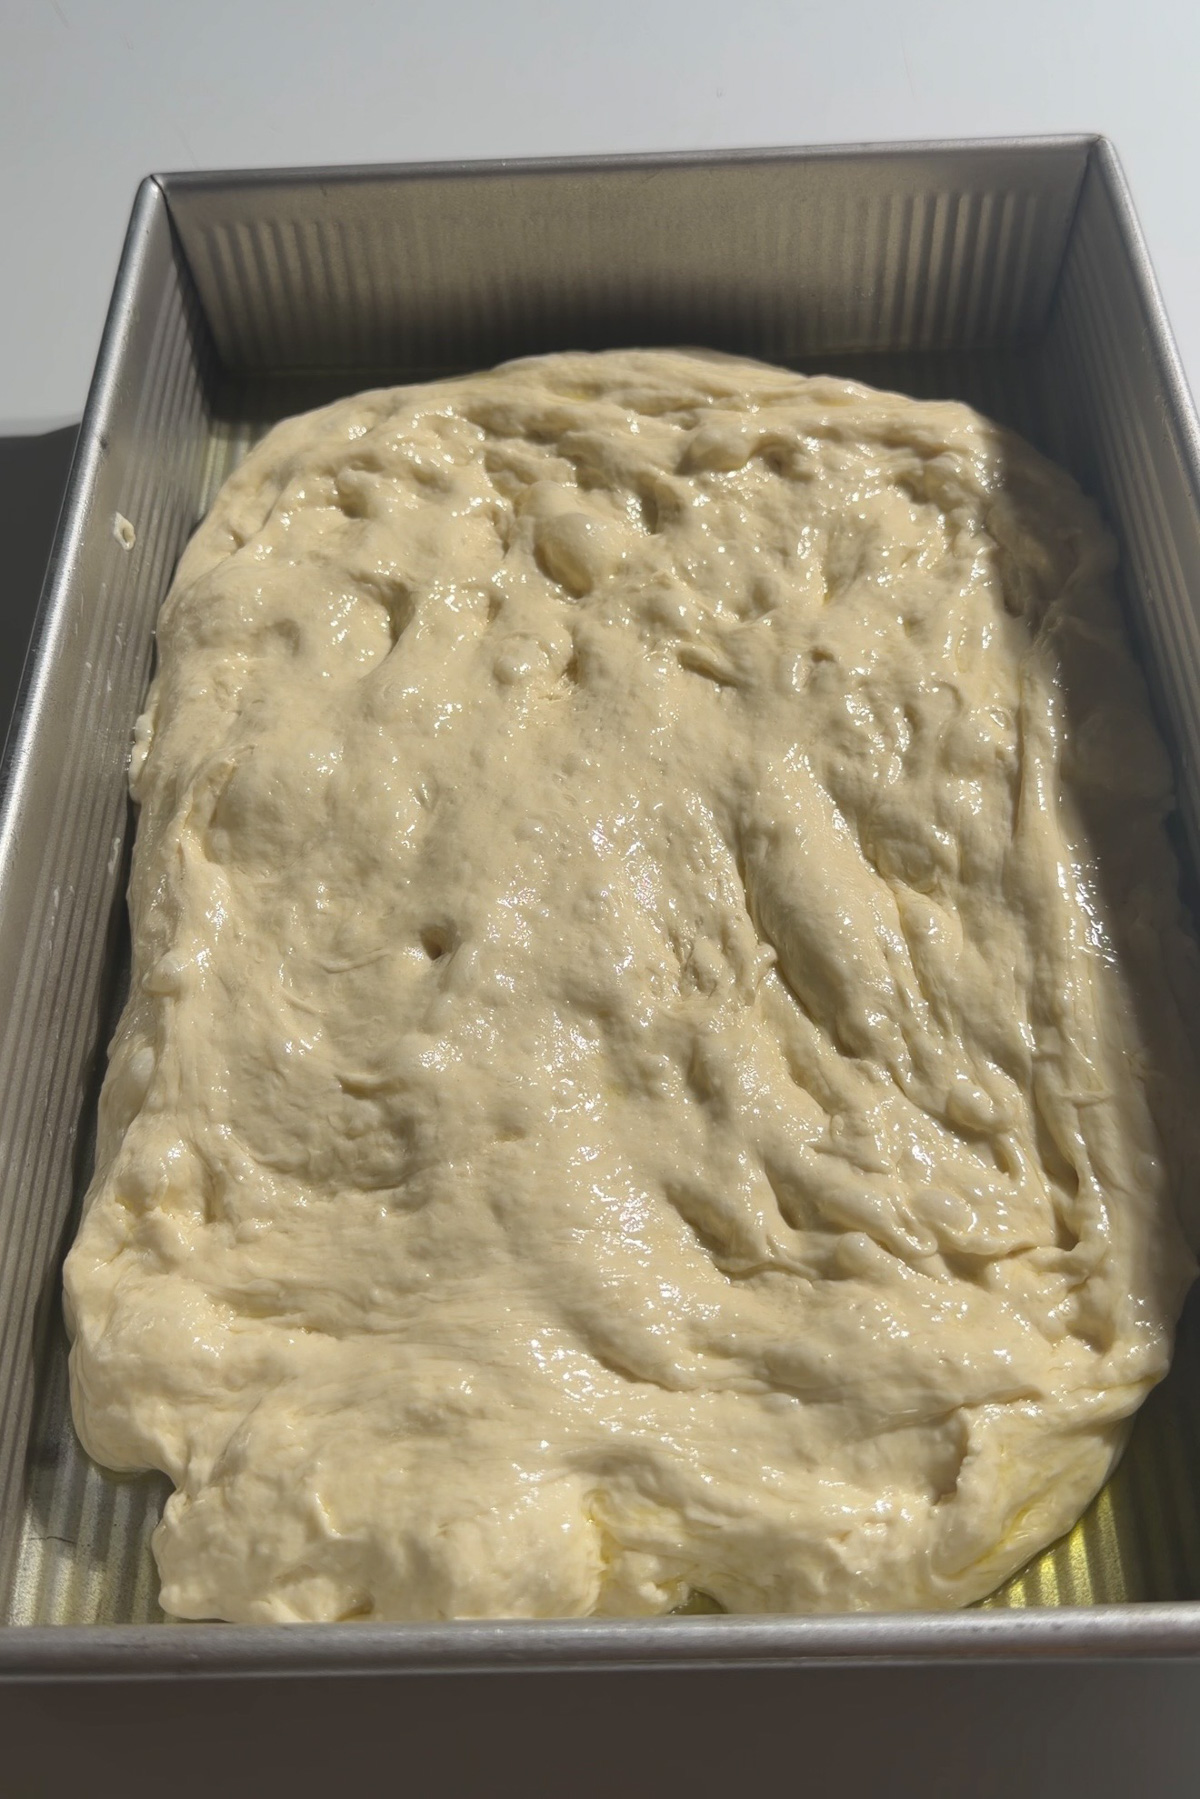
Step 4: Transfer to the pan. Generously coat a metal 9x13-inch baking pan with olive oil. Gently transfer the dough to the pan and flip it once so both sides are lightly coated. Using oiled fingertips, gently stretch the dough toward the corners; if it springs back, let it rest 10–15 minutes and try again.
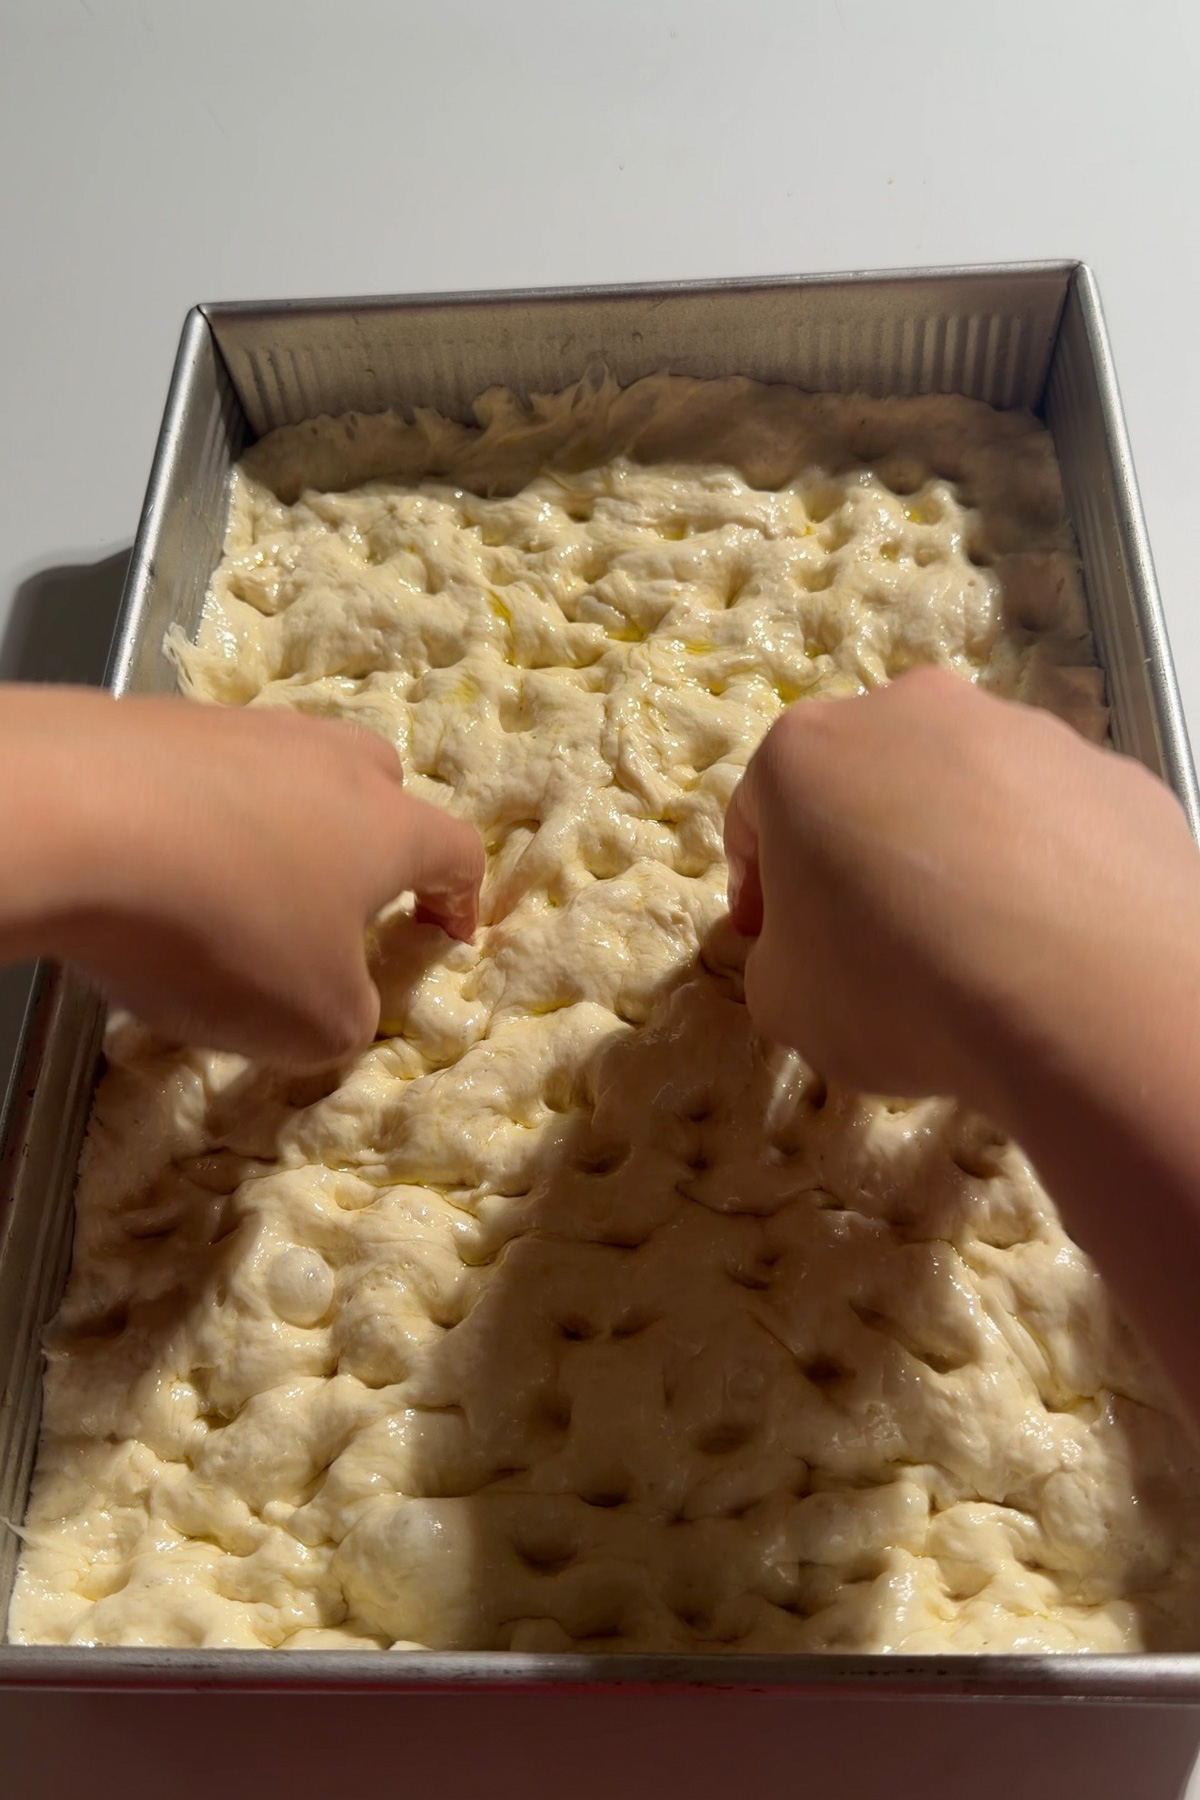
Step 5: Final proof and dimple. Cover the pan loosely and let the focaccia rise 45–75 minutes, until very puffy with visible bubbles beneath the surface; preheat the oven to 425°F (220°C) toward the end of the rise. Drizzle more olive oil over the surface, then press oiled fingertips firmly into the dough all the way to the bottom of the pan to create deep dimples. Sprinkle generously with flaky sea salt and rosemary, if using.
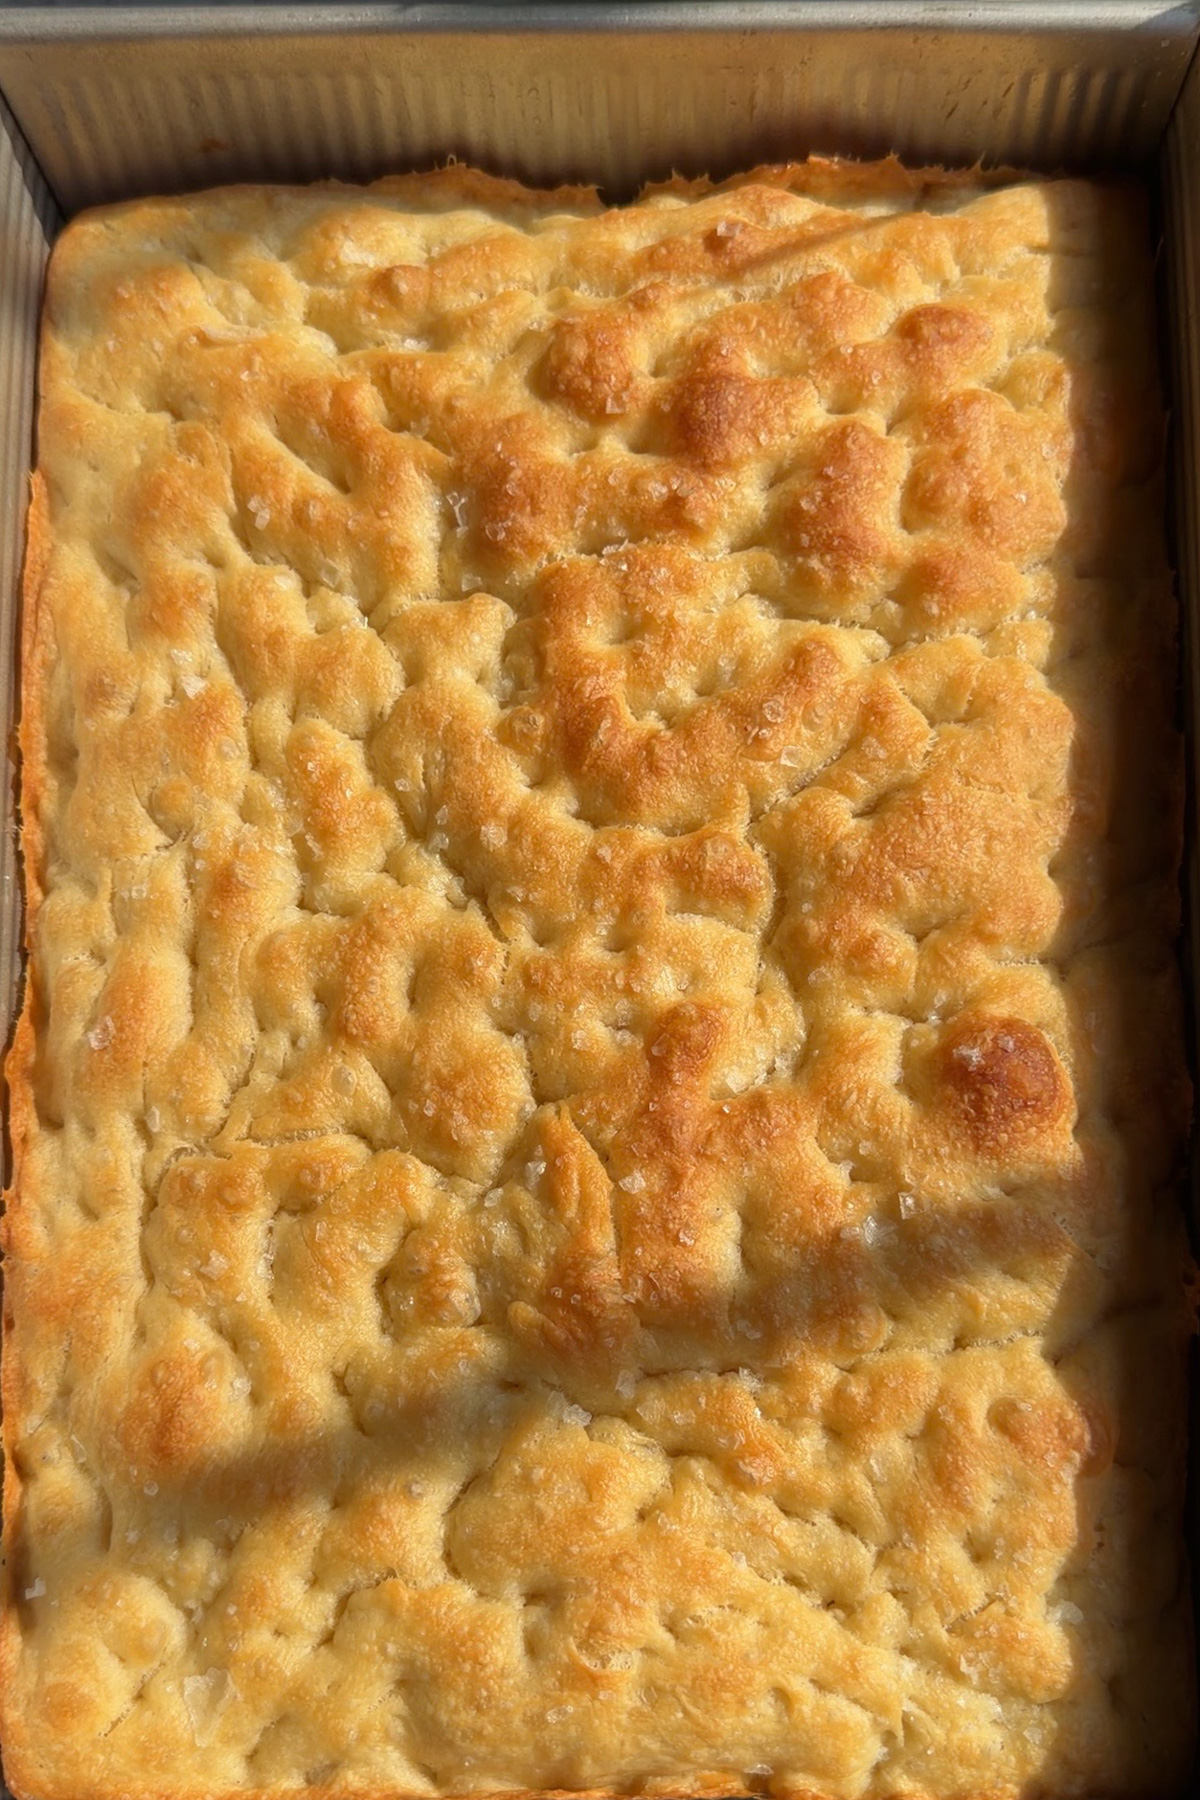
Step 6: Bake and cool. Bake for 23–28 minutes, until deeply golden brown across the top and crisp around the edges; don't pull it while it's still pale, since that deeper color is what gives you the crisp exterior. Let cool in the pan for about 5 minutes, then transfer to a wire rack so the bottom stays crisp.
Weigh your ingredients! Using a kitchen scale ensures your measurements are accurate, which is key for getting consistent results in baking. It takes the guesswork out of measuring and helps your recipes turn out exactly as intended every time.
Overnight Option
This is actually my preferred way to make this focaccia; it gives you more flavor and a lot more flexibility around your schedule.
After completing the stretch and folds, cover the bowl and refrigerate the dough for 8–24 hours instead of doing the same-day first rise. The next day, transfer it to a generously oiled 9x13-inch pan and let it sit at room temperature for about 1½–2½ hours, until very puffy and bubbly, then dimple, top, and bake exactly as directed above.
Expert Tips
- Let the dough stay sticky. Don't add extra flour just because it looks much wetter than a standard bread dough; that higher hydration is what creates the big, irregular holes and light interior.
- Use a metal pan if you can. It conducts heat better than glass and gives you a dramatically better crispy, golden bottom.
- Don't underproof the final rise. This is probably the biggest difference between a dense focaccia and a beautifully airy one; you want the dough to look almost jiggly when you gently shake the pan.
- Be generous with the olive oil. It can look like a lot before baking, but that oil is essentially frying the edges and bottom of the focaccia into that crisp, golden finish.
- Bake until deeply golden. Pulling the focaccia while it's still pale will cost you that crisp exterior and chewy interior; wait for real color across the top.
What Makes This Recipe Special?
Focaccia has a reputation for being finicky, but this version is built to be forgiving. There's no kneading involved; a handful of stretch and folds over 45 minutes builds all the structure a wet, high-hydration dough needs, and the sourdough discard adds flavor and a little extra lift without asking you to feed or wait on your starter.
The overnight option is really where this recipe shines. A long, cold rest after the stretch and folds develops noticeably more flavor than the same-day version, and it fits neatly into an actual schedule; mix the dough one evening, and you're dimpling and baking the next afternoon. It's the same kind of make-ahead flexibility I love in my sourdough discard bagels.
Sourdough Discard Focaccia FAQs
No. This recipe leans on instant yeast for rise, so plain, unfed discard straight from the fridge works perfectly.
That's exactly right. This is a high-hydration dough, and the wetness is what creates focaccia's signature big, irregular holes; resist the urge to add extra flour.
Can I use a glass or ceramic pan instead of metal?
You can, but expect a paler, less crisp bottom; a metal pan conducts heat more evenly and gives you that deeply golden, crisp crust on the underside.
Yes, and I'd actually recommend it; see the overnight option above for the version with the most flavor.
This same wet, olive-oil-rich dough works beautifully as a base for sourdough discard pizza too, with a slightly shorter rise.
Sourdough Discard Focaccia Troubleshooting Guide
| Problem | Cause | Fix |
|---|---|---|
| Focaccia is dense, not airy | Final proof cut short | Let the dough proof until very puffy and almost jiggly when the pan is shaken |
| Dough won't stretch to the corners | Dough is too tight, or rested too briefly between stretches | Let it rest 10–15 minutes and try again; it will relax with time |
| Bottom isn't crisp | Glass or ceramic pan used, or pan wasn't oiled generously | Use a metal pan and don't skimp on the olive oil underneath |
| Top is pale instead of golden | Pulled from the oven too early | Bake until deeply golden brown across the top, not just set |
| Crumb is tight, without big holes | Extra flour added to the sticky dough | Resist adding flour; the wet, sticky texture is what creates the open crumb |
Storage
- Room temperature: Store in an airtight container or wrapped tightly at room temperature for up to 2 days.
- Refrigerator: Store in an airtight container in the fridge for up to 5 days.
- Freezer: Wrap tightly and freeze for up to 2 months; thaw at room temperature.
- Reheating: Warm in a 350°F oven for 5–10 minutes to bring back the crisp bottom and edges; a toaster oven works well too.
Other Sourdough Discard Recipes to Consider
Did you make this recipe?
If you try this recipe, I’d love if you left a quick rating and review below! It really helps support my blog and lets others know how the recipe turned out for you. Also, don't forget to tag me @kneadedthat on Instagram and use the hashtag #kneadedthat so I can see what you made and share it!
Sourdough Discard Focaccia
Equipment
- Digital kitchen scale
- Large mixing bowl
- Dough whisk or wooden spoon
- Metal 9x13-inch baking pan
- Wire cooling rack
Ingredients
Focaccia Dough
- 360 g warm water about 90–100°F (1½ cups)
- 100 g sourdough discard preferably 100% hydration (about ½ cup)
- 7 g honey 2 teaspoons
- 6 g instant yeast 2 teaspoons
- 450 g all-purpose flour 3¾ cups
- 10 g fine sea salt 1¾ teaspoons
- 25 g extra virgin olive oil 2 tablespoons
For the Pan and Topping
- 3 –4 tablespoons extra virgin olive oil divided
- Flaky sea salt
- Fresh rosemary optional
Instructions
- In a large bowl, whisk together the warm water, sourdough discard, honey, and instant yeast. Add the flour and salt. Mix with a dough whisk, wooden spoon, or your hands until no dry flour remains. The dough will be very wet and sticky; this is intentional.360 g warm water, 100 g sourdough discard, 7 g honey, 6 g instant yeast, 450 g all-purpose flour, 10 g fine sea salt
- Cover the bowl and let the dough rest for 15 minutes.
- Drizzle the 25g olive oil over the dough. With damp or lightly oiled hands, grab one side of the dough, stretch it upward, and fold it over itself. Rotate the bowl and repeat on all four sides. Cover and rest for 15 minutes, then repeat the stretch and fold process. Repeat once more after another 15 minutes, for a total of 3 sets of folds. The dough should become smoother and more elastic with each round.
- Cover the bowl and allow the dough to rise at warm room temperature for about 60–90 minutes, or until noticeably puffy and increased in volume by roughly 50–75%.
- Generously coat a metal 9x13-inch baking pan with about 2 tablespoons olive oil. Gently transfer the dough to the pan. Flip it once so both sides are lightly coated in oil. Using oiled fingertips, gently stretch the dough toward the corners of the pan. Don't force it; if it springs back, let it rest for 10–15 minutes and then stretch it again.25 g extra virgin olive oil
- Cover the pan loosely and allow the focaccia to rise for another 45–75 minutes, until very puffy with visible bubbles beneath the surface. Toward the end of the rise, preheat the oven to 425°F (220°C).
- Drizzle another 1–2 tablespoons olive oil over the surface. Coat your fingertips in olive oil and press them firmly into the dough, all the way toward the bottom of the pan, creating deep dimples across the surface. Sprinkle generously with flaky sea salt and fresh rosemary, if using.3 –4 tablespoons extra virgin olive oil, Flaky sea salt, Fresh rosemary
- Bake for 23–28 minutes, or until the focaccia is deeply golden brown across the top and crisp around the edges. For the best texture, don't pull it when it is merely pale golden; the deeper color gives you that crisp exterior and chewy interior.
- Let cool in the pan for about 5 minutes, then transfer the focaccia to a wire rack so the bottom stays crisp. Drizzle with a little additional olive oil before serving, if desired.


Leave a Reply